I came across a cool kickstarter project called Circuit Scribe that allows you to draw electronic circuits with conductive ink on paper using a pen.
This is really fascinating, because it allows you instantly prototype without using breadboard and it is also a very cool way to teach electronics to kids.
Each pen costs around $20 (plus shipping) and I am buying at least a couple of them.
If you are in Bangalore and are interested in this, then let me know. We could save money shipping cost by ordering a 5 or 10 pen bundle.
The answer is a definite yes and I use it all the time, since I have a lot of Arduinos lying around. I thought of writing a tutorial, so that it will be useful for others who want to do this.
In this tutorial, I will show how you can program a non-Arduino AVR microcontroller like AtMega 16/16A using Arduino as an ISP programmer.
Loading Arduino ISP sketch
By default Arduino IDE comes with an ISP sketch. All you need to do is to open it up in your Arduino IDE (or using my Arduino makefile), then connect your Arduino to your computer and then upload the sketch to your Arduino.
You should not connect anything else to your Arduino at this point and you will find the Arduino ISP sketch in File -> Examples -> ArduinoISP
Installing Arduino core for your microcontroller
The next step is to find the Arduino core support for the microcontroller you want to program and then install it.
If you want program ATMega 16/16A, then you can use my “Arduino extra core“. I have also written a separate tutorial explaining how to use it. Or if you want to program ATtiny microcontrollers, then you can use the ATtiny core by David Mellis, one of the co-founders of Arduino.
Most of the time, you just have to place these core files inside /hardware directory in your sketchbook folder, but consult the documentation of the actual core library you are using.
Connect the circuit
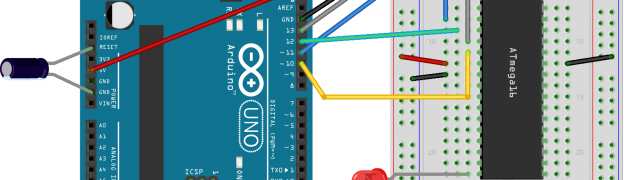
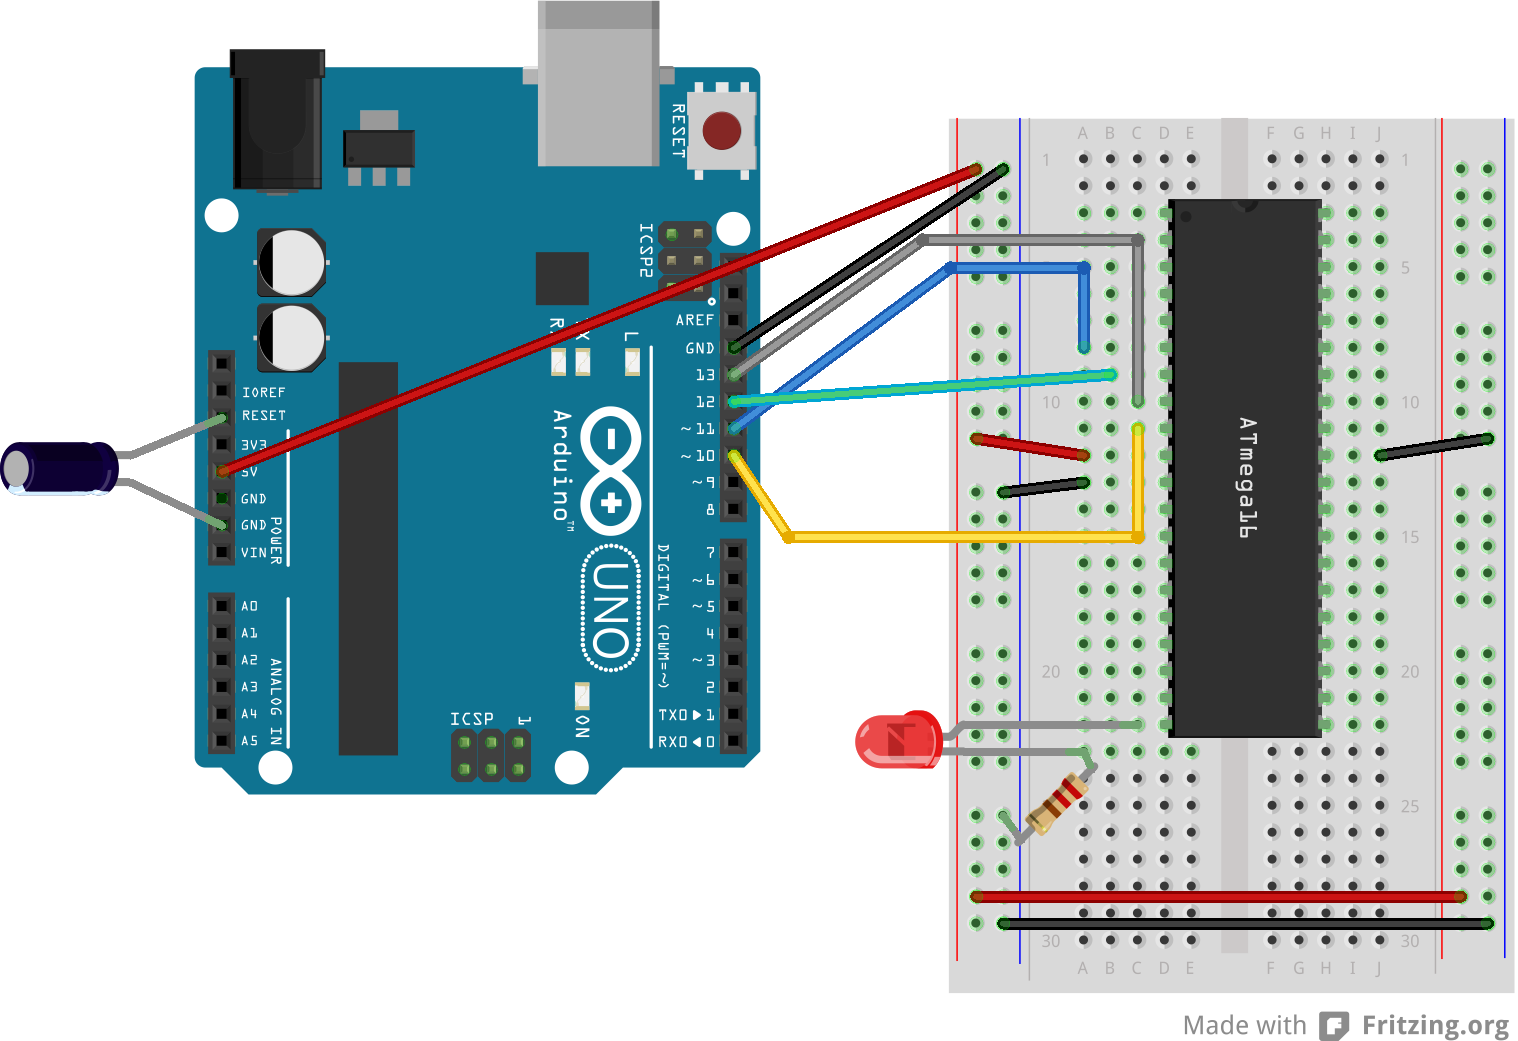
The next step is to connect the microcontroller to your Arduino. The below diagram shows how to connect ATMega 16/16A. In general the principle remains the same for other micro controllers as well.
Program ATMega 16 using Arduino as ISP Programmer
The following are the different pin connections
Arduino Pin 13 to ATMega 16 Pin 8 (or SCK of another microcontroller)
Arduino Pin 12 to ATMega 16 Pin 7 (or MISO of another microcontroller)
Arduino Pin 11 to ATMega 16 Pin 6 (or MOSI of another microcontroller)
Arduino Pin 10 to ATMega 16 Pin 9 (or RESET of another microcontroller)
Arduino 5+ to ATMega 16 Pin 10 (or Vcc of another microcontroller)
Arduino Gnd to ATMega 16 Pin 11 (or Gnd of another microcontroller)
10 uF capacitor between Arduino Reset Pin and Gnd Pin (+ve leg of capacitor should go to Reset pin)
LED through proper resistor on any pin of the microcontroller, which you will be controlling through code
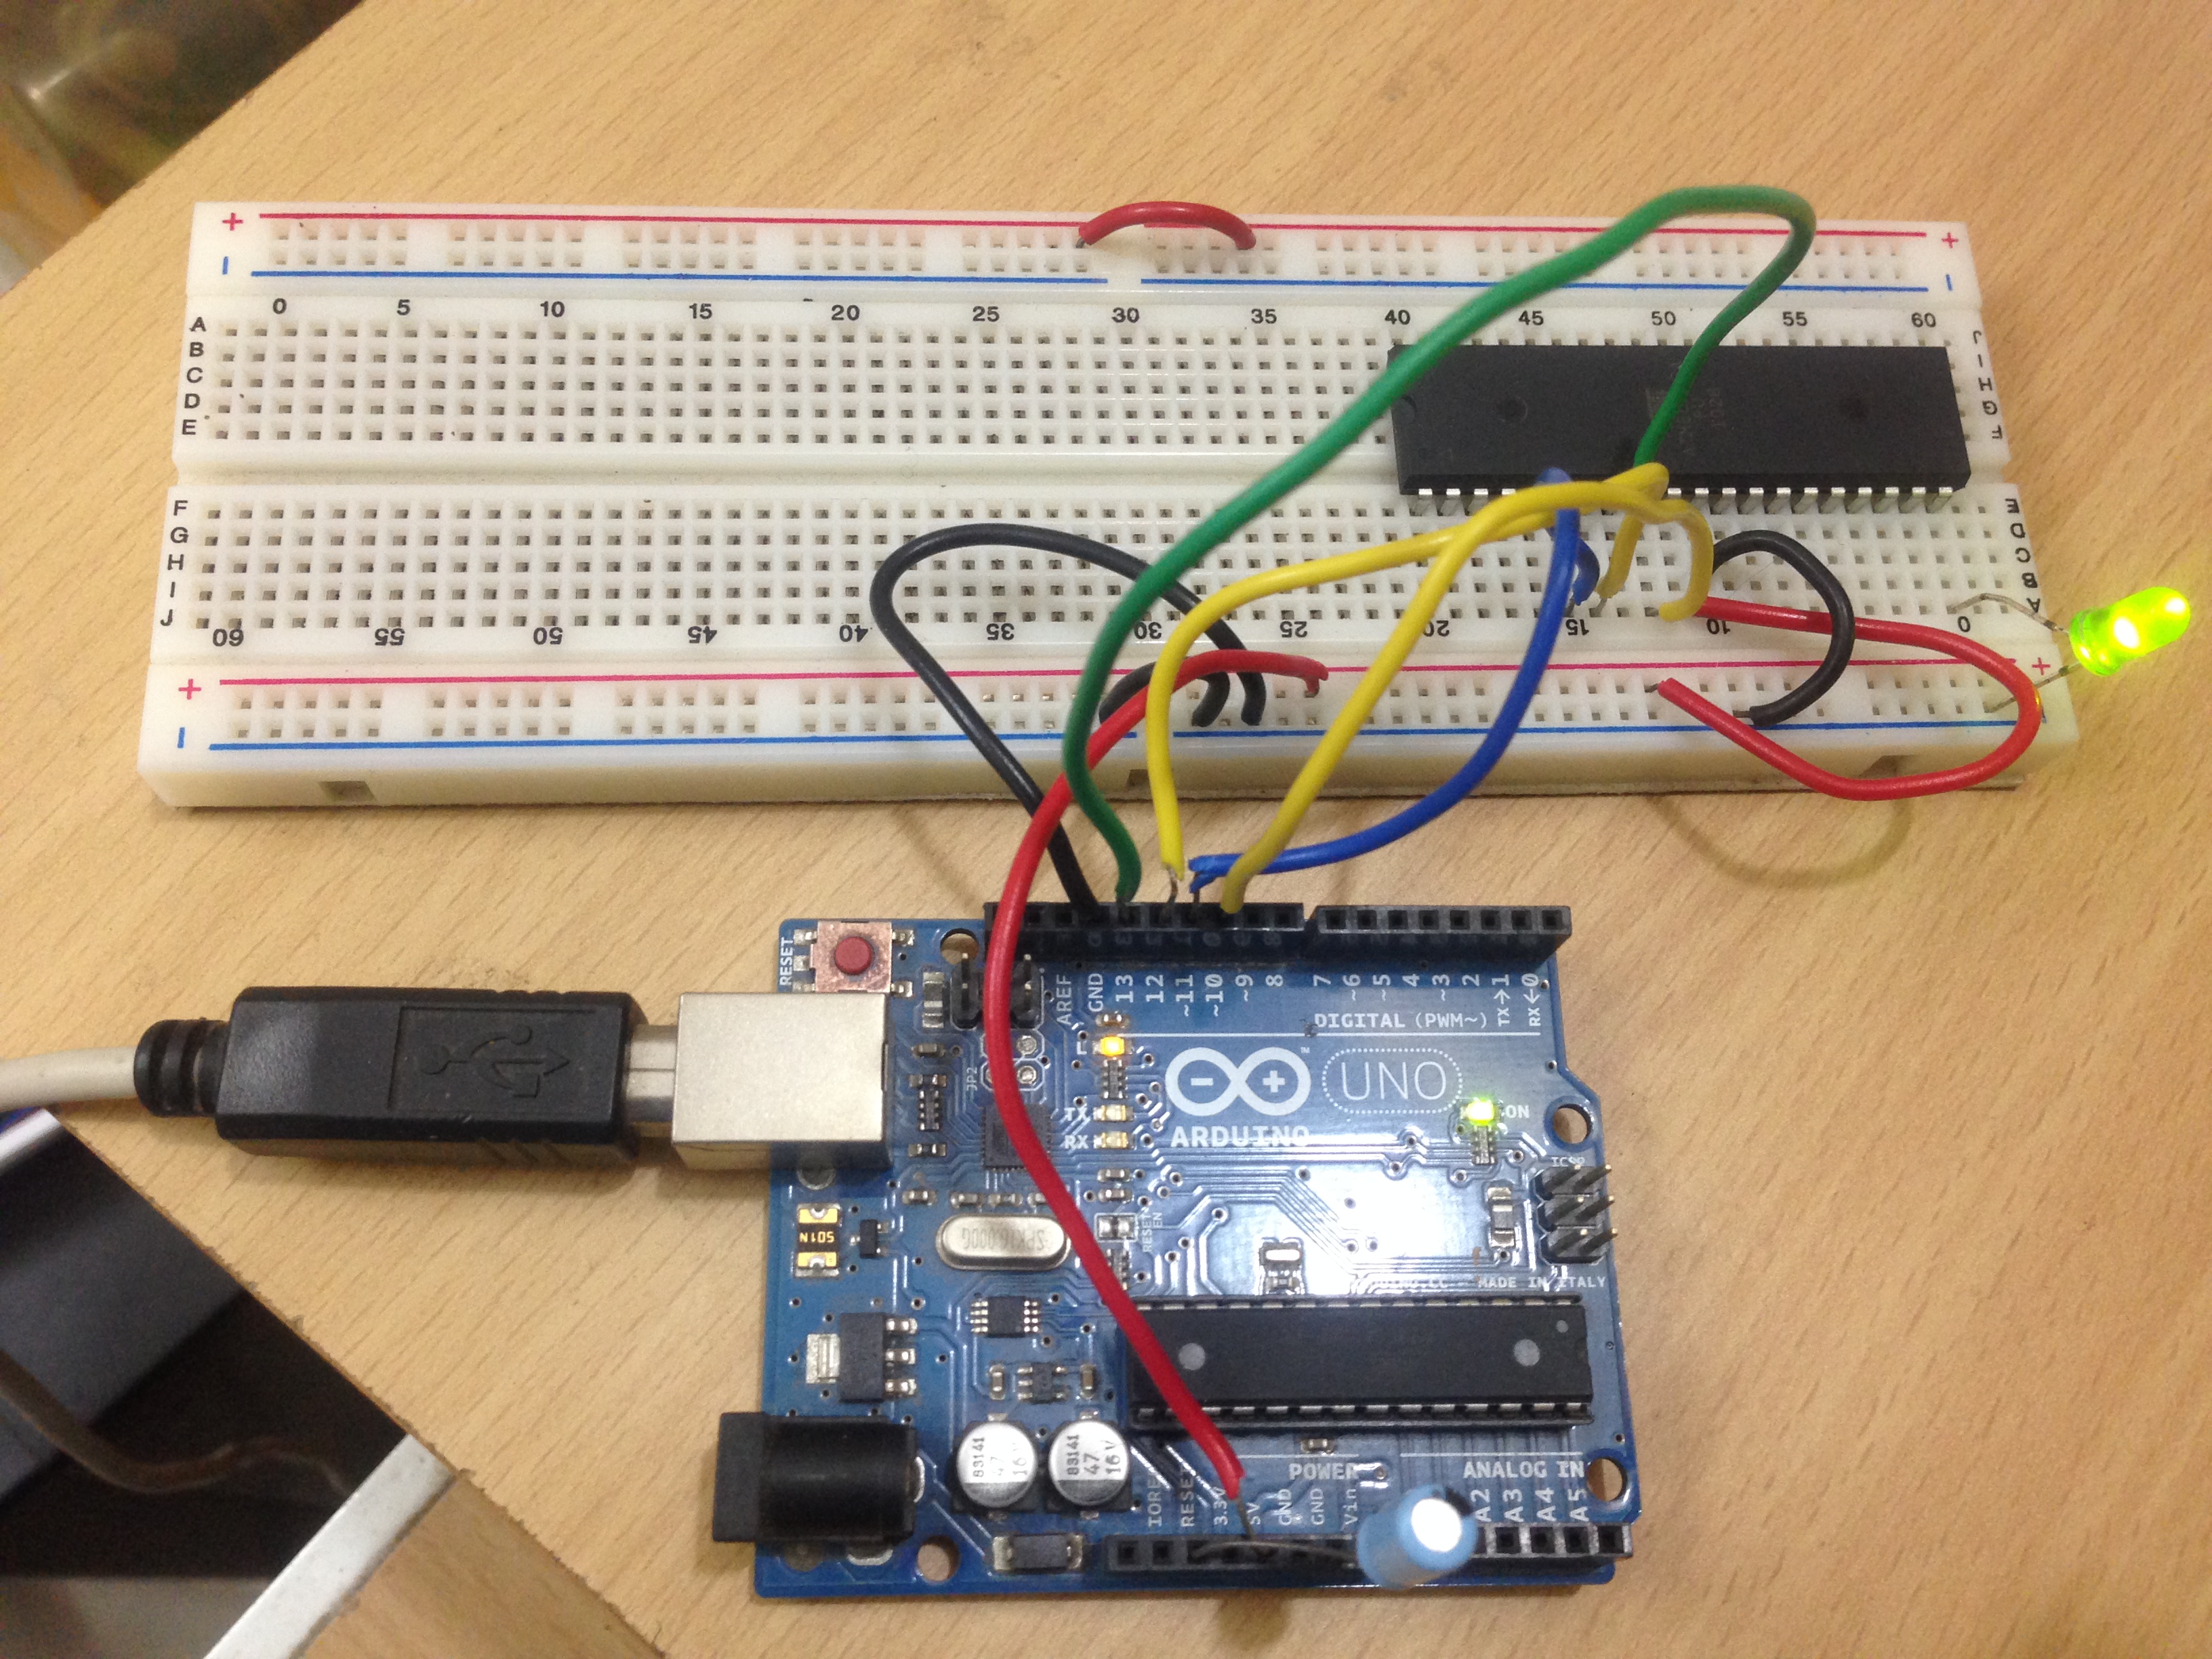
This is how my connection looks like
Program ATMega 16 using Arduino as ISP Programmer
Burn bootloader/fuse
The next step is to burn the bootloader or/and fuses. For most cores, you don’t need to use the bootloader.
My Arduino extra core doesn’t need any bootloader, but only needs some fuses to be set.
You can burn the bootloader and/or the fuses, by selecting Tools -> Burn Bootloader. Make sure you have chosen the correct board type before you do that.
Upload your sketch
Now, everything is ready, and all you need to do is to write your sketch and then upload it. The ISP sketch that your burned into your Arduino, will take care of the rest.
To use serial monitor, with your microcontroller, you can use my other tutorial which shows how you can use another Arduino as a bridge.
Upload your sketch using makefile
My Arduino makefile also supports uploading sketches through Arduino ISP programmer. Follow all the normal instructions and then define ALTERNATE_CORE and ISP_PORT in your makefile and run make ispload target.
Recently in Maker Faire Rome, Arduino announced two new Linux based Arduino boards – Galileo in collaboration with Intel (Yes 😉 ) and Arduino TRE in collaboration with Texas Instruments (the company behind BeagleBoard). Together with Arduino Yun, now the total number of official Arduino Linux based boards is 2.
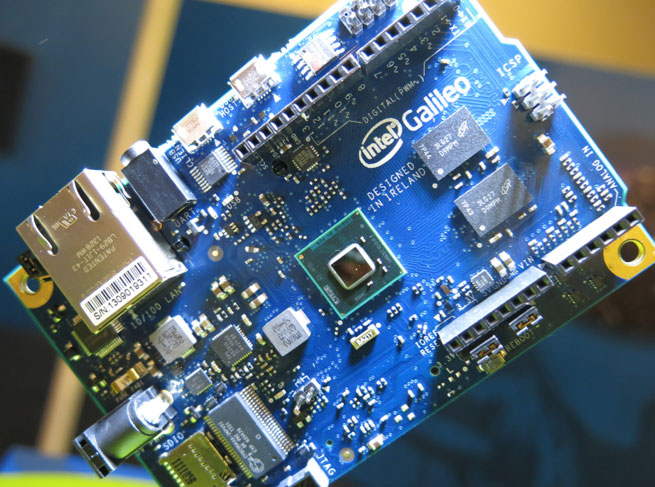
Intel Galileo
First Arduino certified board using Intel chip
This board is created in collaboration with Intel and will be called Intel Galileo instead of Arduino Galileo. It is an Arduino certified board, the first one of this category and I guess that is the reason it is called Intel Galileo and not Arduino Galileo. This board was announced by Massimo Banzi along with Intel CEO Brian Krzanich in Maker Faire Rome.
Galileo is a microcontroller board based on the Intel® Quark SoC X1000 Application Processor, a 32-bit Intel Pentium-class system on a chip. And the Arduino website claims that this will be a great tool for prototyping simple interactive LED light displays and to create home automation solutions.
Intel Galileo will be available for purchase from November 19 – 2013, but the pricing information is still not available.
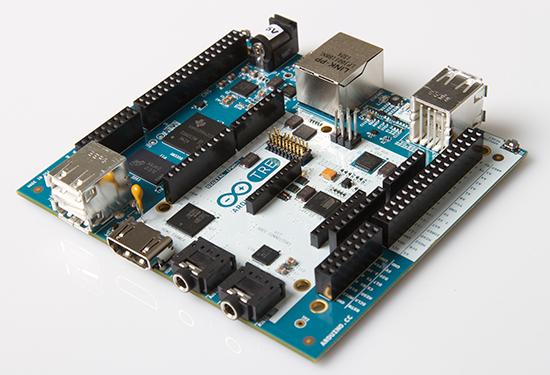
Arduino TRE
The most powerful Arduino till date
The second board which was announced (also in Maker Faire Rome) is Arduino TRE, which was developed in collaboration with Texas Instruments.
Arduino TRE is a combination of two Arduinos, which is quite clear if you look at the above image. One is based on the Texas Instruments Sitara AM335x ARM Cortex-A8 processor and the other is a AVR-based Arduino. This board will be able to run “full Linux”, not a stripped down version like Arduino Yun. Arduino website also claims that this is the “most powerful Arduino to date”.
Arduino TRE, based on the Texas Instruments Sitara AM335x ARM Cortex-A8 processor is the “most powerful Arduino to date” and the first that will be able to run “full Linux.”
Thanks to the 1-GHz Sitara AM335x processor, Arduino developers get up to 100 times more performance with the Sitara-processor-based TRE than they do on the Arduino Leonardo or Uno. This performance opens the doors to more advanced Linux-powered applications. The Sitara-processor-based Linux Arduino can run high-performance desktop applications, processing-intensive algorithms or high-speed communications.
Arduino TRE will be available for purchase from Spring 2014, but the pricing information is still not available.
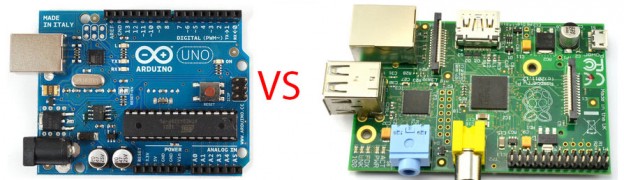
How it compares with Raspberry Pi?
It is pretty clear, that both these boards and also Yun have been motivated by Raspberry Pi, but the real question is how does these boards compare with Raspberry Pi?
I would say that either Arduino Yun or TRE is comparable with Raspberry Pi, since both can run Linux. Intel Galileo falls into the class of Arduino Due, which are slightly different from Raspberry Pi.
I guess both cost and ease of programming would be crucial factors in deciding between Arduino and Raspberry Pi. Arduino Yun itself is priced at $69, so definitely Arduino TRE will cost more than that, which means Raspberry Pi is going to have a clear advantage here.
But I guess in the ease of programming perspective, Arduino might have an upper hand. I guess the Bridge library which was created for Arduino Yun will be extended for Arduino TRE as well. The Bridge library provides very simple Arduino friendly API’s to access and control Linux and I guess that may be a huge game changer.
So at this point, I guess we can only speculate. It would be really interesting to see how things unfold. But one thing is certain, the future for makers and tinkers is bright 🙂
Today, I conducted a small hands-on workshop in Arduino at work. We had a bunch of Arduinos and kits available and everyone was able to try it out themselves.
Slides
I have uploaded the slides I used for my talk to my slideshare account. You can download the slides or view them below. You can also checkout my other presentations and slides from my talks page.
Demo code
During the workshop, I showed a couple of demos, explaining different ways by which we can control Arduino. The source code and the circuits are available in my github account.
After several months of development, I am proud to announce v1.0.0 of Arduino Makefile.
What is Arduino Makefile?
It is a set of makefiles for Arduino, that allows you to compile and flash code into Arduinos and also communicate with it through Serial all using the makefile, without opening up the Arduino IDE. This is really useful, if you want to use your favourite IDE for coding Arduino or want to automate stuff from command line.
The major feature that was added in this release is the support for Digilent ChipKIT boards. In addition to this, the following features were also added to this release.
Support for “Micro” Arduinos
Improve avrdude and avrdude.conf path auto detection
The first question people ask me these days when I talk about either Raspberry Pi or Arduino is what is the difference between them. This was one of the prominent question that people asked me during my recent PyCon talk and Maker Party presentation.
Even though both Raspberry Pi and Arduino are created to solve different problems, there is a slight overlap and people get confused on which one to choose for their projects.
Instead of answering people individually, I thought I would rather write a blog post so that I can point people to it when ever the question arises again.
Raspberry Pi
Source: http://learn.adafruit.com/assets/2846
As most of you would know, Raspberry Pi is a full-fledged credit card sized computer with 512 MB RAM and 700 MHz micro processor. It can run a full Linux based operating system and has hardware support for SPI, I2C and Serial.
Pros
The following are some of the main advantages of Raspberry Pi
Entire Linux software stack is available
It is very easy to connect to internet
Can be programmed using variety of programming languages
Cons
The following are some of the main limitations of Raspberry Pi
Accessing hardware is not real-time. If the CPU is busy, then interfacing with hardware can be delayed
No built-in Analog to Digital converter available
Does not have enough power to drive inductive loads
The hardware design is not open source. Even though it is not a big deal, for some people it might a deal breaker
When to use (and not use) Raspberry Pi
If you project has very limited hardware interaction but is slightly complex on the software side or need to be connected to internet then you should just go with Raspberry Pi. Also if you want to program using variety of programming languages (not limited to C/C++), then you should choose Raspberry Pi.
On the other hand, if you project requires a lot of hardware interaction and need to read data from lot of sensors or need to control lot of devices, then Raspberry Pi may not be best choice.
Arduino
Source: http://learn.adafruit.com/assets/3199
Arduino is a collection of three things. A hardware prototype platform, Arduino language and IDE & libraries. The board is based on 8-bit AVR microcontroller. It has built-in hardware support for SPI, I2C and Serial.
Pros
The following are some of the main advantages of Arduino.
Very easy to get started
Very easy to extend it and has tons of user contributed shields and libraries. Shields are available to do pretty much anything
Can be used to for real-time applications
Everything (both hardware, software and IDE) are open source
Not much programming knowledge needed to do basic stuff
Cons
The following are some of the main limitations of Arduino.
Not very powerful when compared with Raspberry Pi (Micro processor vs Micro controller)
You need to program using either Arduino or C/C++ (or assembly if you really want to)
Connecting to internet is slightly difficult (you have shields and libraries, but is not straight forward), but not impossible. I have in fact used Arduino with YQL and JSON parsing as well.
When to use (and not use) Arduino
If you project requires you to interact with lot of or complex external hardware, then you should consider using Arduino.
On the other hand, if your project requires lot you to write complex software or requires entire software stacks or protocols, then Arduino may not be the best options.
In Short
In short, this is the summary
Feature
Raspberry Pi
Arduino
Processor Speed
700 MHz
16 MHz
Programming Language
No limit
Arduno, C/C++
Real-time Hardware
No real-time
In real-time
Analog to Digital Convertor
No
Yes
Hardware Design
Closed source
Open source
Internet Connection
Very easy
Not easy, but doable
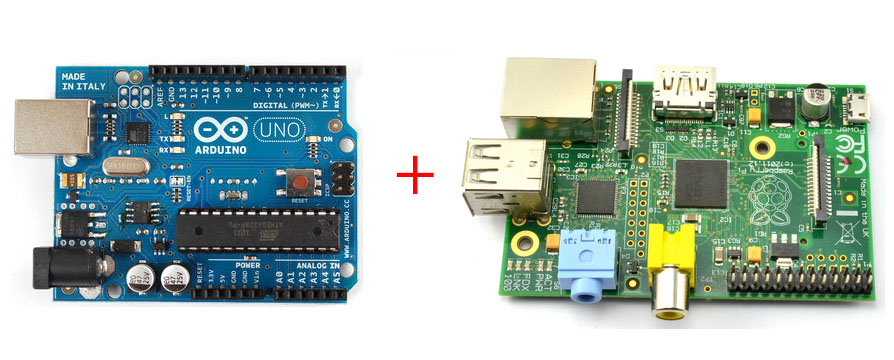
Best of both worlds
If you project requires both software and hardware equally, then you can also use both Arduino and Raspberry Pi together in your project and get the best of both worlds.
Source: http://learn.adafruit.com/assets/2846 and http://learn.adafruit.com/assets/3199
If you feel, I missed out any important points, then feel free to leave a comment below or ping me in Twitter and I will add them to the list.
‘Maker Party: Bangalore 2013’ is a Mozilla Hive India initiative in an attempt to map and empower a community of educators and creative people who share a passion to innovate, evolve and change the learning landscape.
The event has a simple format like science fair, where facilitators are sharing something exciting, teach something new in a engaging way. This event is a platform to connect diverse organizations and encourage connected learning.
What I am going to be doing
Since we are expecting a couple of school kids, I am planning to conduct a workshop explaining how people can get started with electronics.
I am planning to showcase both Arduino and Raspberry Pi and tell them how easy it is to get started. For Raspberry Pi, I am going to show the demos that I created for my recent PyCon talk as well.
I am personally really excited since this is the first time I am going to be interacting with kids and teach them some electronics, which I hoped someone did for me when I was kid 🙂
Update
Here is the photo and blog post from Mozilla India.
PyCon India, the premier conference in India on using and developing the Python programming language is conducted annually by the Python developer community and it attracts the best Python programmers from across the country and abroad
Slides
I have uploaded the slides I used for my talk to my slideshare account. You can download the slides or view them below. You can also checkout my other presentations and slides from my talks page.
Video
You can also checkout the entire session in the following video.
Demo
During the presentation, I gave a couple of demos, showing how to access and control the GPIO pins of Raspberry Pi from Python.
I created the following custom PCB to make it easy for me to show the demo, instead of wiring everything using breadboard.
The source code and the circuits are available in my github account.
By the way, in addition to showing the demos, I actually presented the entire presentation (including the slides) from Raspberry Pi itself 😉
Shift Registers are one of my favorite devices. It is really fascinating, when you understand how they work.
Ever since I learned how Shift Registers work and how you should use them, I was planning to write an article explaining it.
While browsing around, I found an excellent video by Kevin Darrah which explains how shift registers work and how to use them exceptionally well. After seeing that, I realized that even if I did an article, it still wouldn’t be able to explain it better than this video and so I left the idea of writing an article about it 😉
So without much delay, here is the excellent video by Kevin, which explains how shift registers work and how you can use them.
I had a bunch of ATmega 16A and ATtiny 85 microcontrollers lying around and I was trying to find a way to program them using Arduino code. There are two main reasons, why I wanted to use Arduino code. The first reason was to use the many built-in functions like digitalWrite, digitalRead etc. And the second reason was to use the various built-in and user contributed Arduino libraries.
Since the official Arduino supports more than 3 types of microcontrollers (Uno, Mega, Leonardo), I had a hunch that supporting other microcontrollers should be easy. With this in mind, I started digging into Arduino code. After referring to couple of files inside the hardware folder, I found a way by which you can easily add support for non-Arduino AVR microcontrollers.
pins_arduino.h file
The developers of Arduino, have cleanly separated out the pin definitions into a separate files. This allows you to easily add support for new non-Arduino AVR microcontrollers.
To add support for ATmega 16A, I just copied the Uno’s pin_arduino.h file from hardware/arduino/variants/standard/ folder in Arduino installation directory and started modifying it.
In the pin_arduino.h file, you need to change the following things.
The number of digital pins
The number of analog pins
Analog pin mappings and const for Analog pins (actual values for A0, A1)
Digital pin to PCICR mapping
Pin to port (PORTA, PORTB etc) mapping
Pin to timer mapping
Most of these are straight forward and you can get the correct values from the target AVR chips datasheet. You can refer to the pin mapping file for ATmega 16A that I created.
boards.txt file
The Arduino IDE (and also my Arduino makefile) get details about your board from a file named boards.txt. This simple text file, has the details about your board and also instructs the Arduino IDE to use the proper parameters and fuses while compiling and uploading programs.
To let the Arduino IDE, know about our new microcontroller, we need to create a new boards.txt file which has the following information about the microcontroller.
Upload protocol
Upload speed (baudrate)
Upload fuses
Clock frequency
Maximum flash memory size
Which variant (pins_arduino.h) file to use
Like the pins_arduino.h file, most of these are straight forward and you can get most of these details from the target AVR chips datasheet. You can refer to the boards.txt file, that I created for ATmega 16A.
Integration with Arduino IDE
Once we have created the pins_arduino.h and boards.txt file, we should then place them in a proper directory structure, which the Arduino IDE could understand.
First, create a directory called hardware in your sketchbook directory. After that create a new directory inside it to keep all our files. I named it arduino-extra-cores. Place the boards.txt file inside this directory. Now create a directory named variants and then create another directory with the name of your microcontroller. Place the pins_arduino.h file inside this directory.
Once you have done this, the directory structure should look like this.
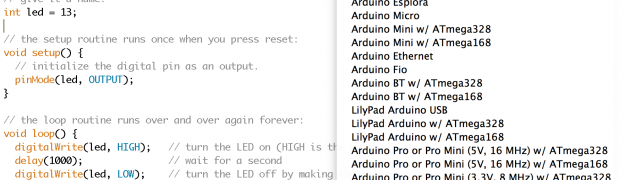
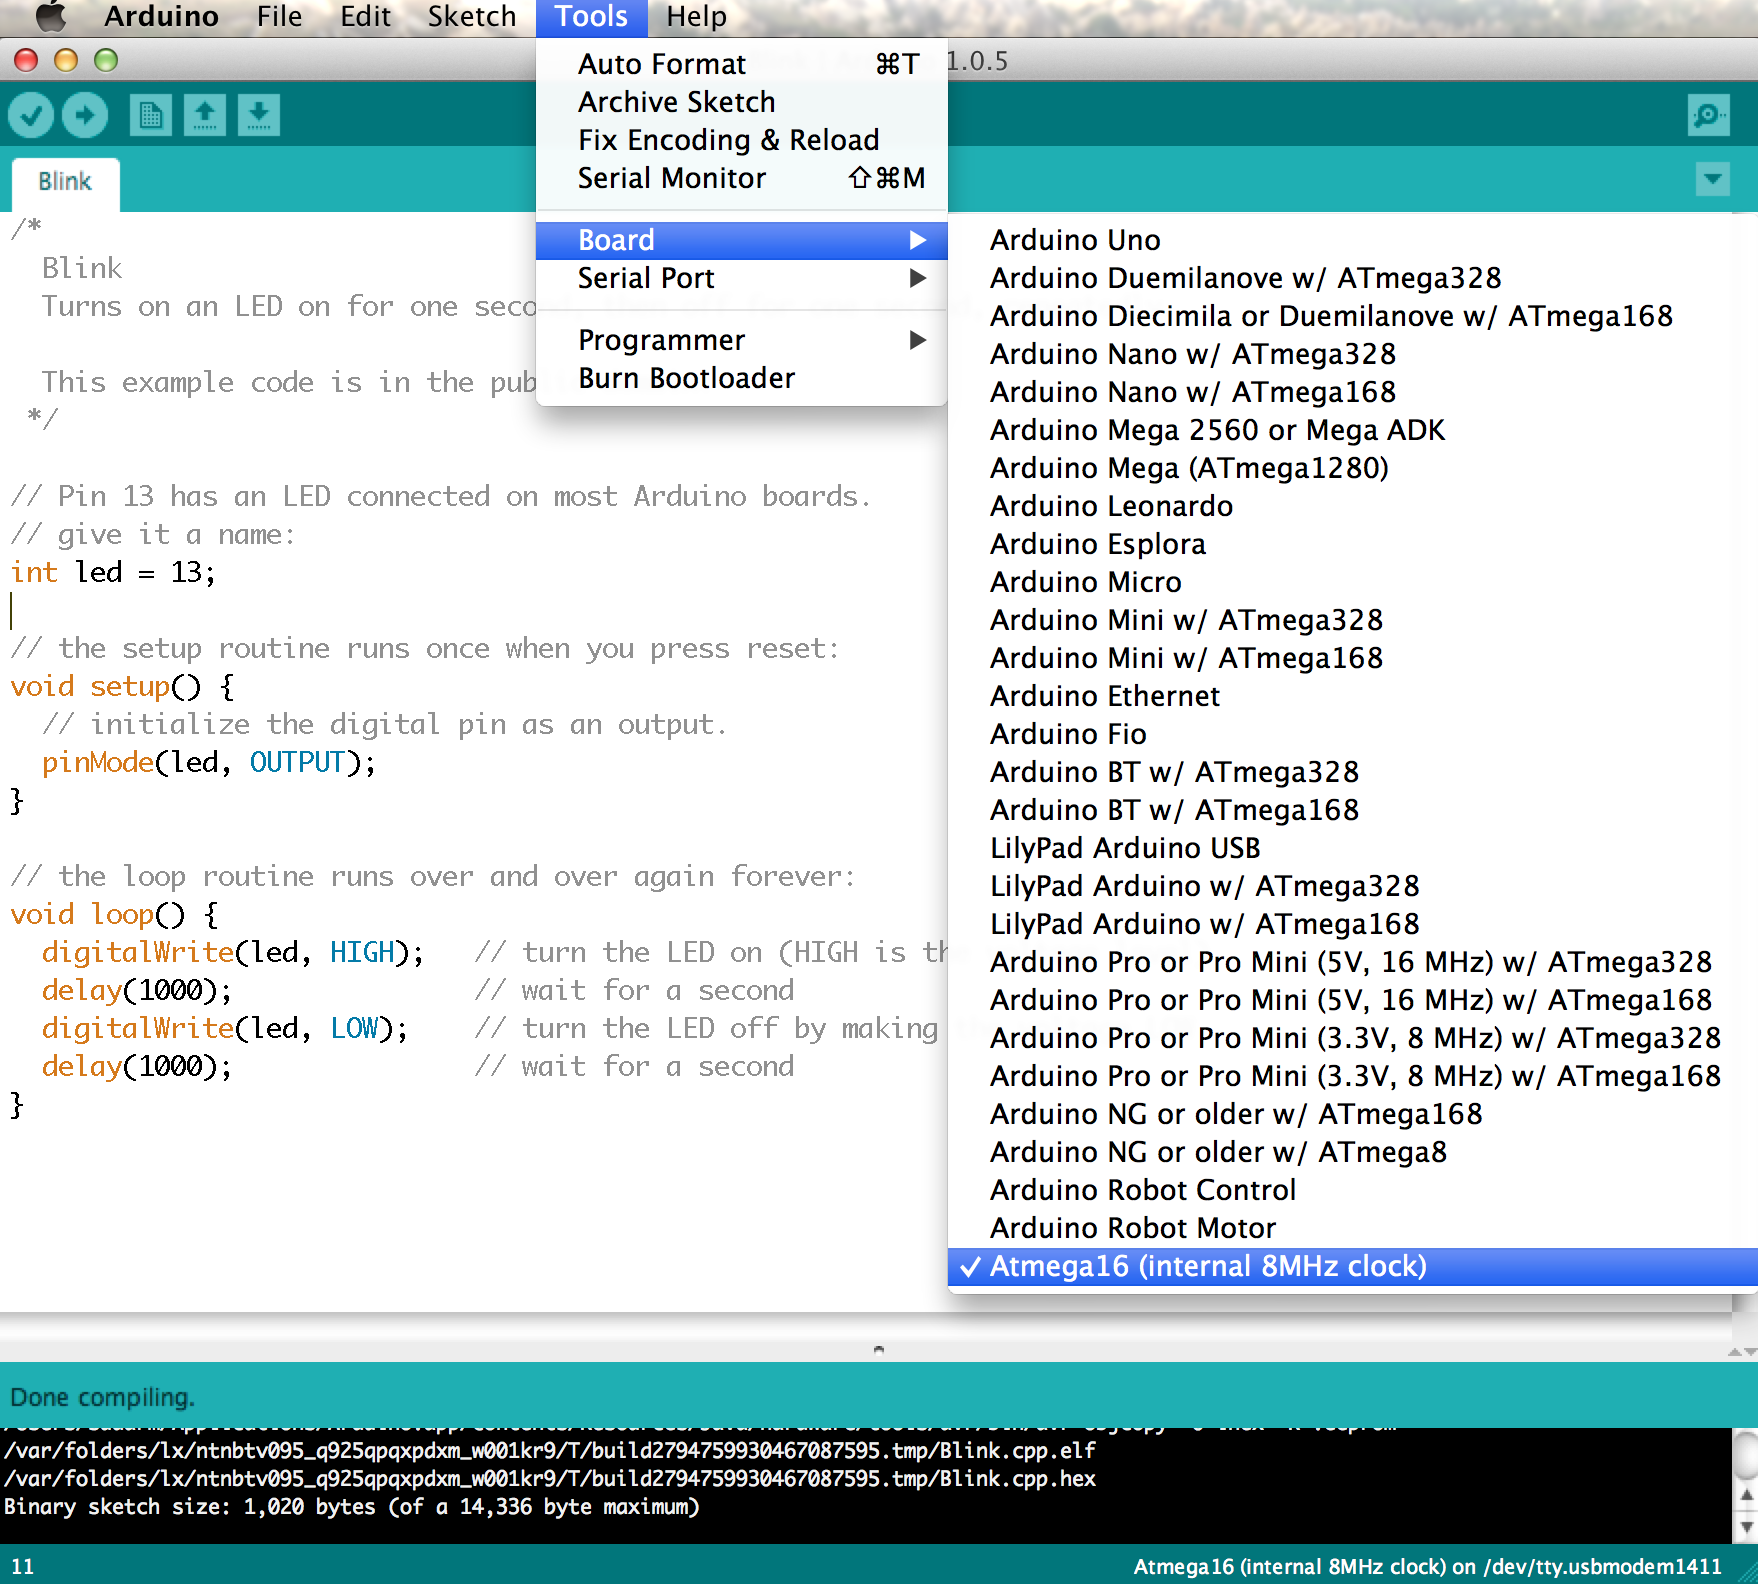
After doing this, restart your Arduino IDE and you should see the new entry that you created in the boards.txt file under the Boards menu, like below.
To compile and upload Arduino programs to your new microcontroller, you just have to select the new entry from the Boards menu, everything else will be taken care by the Arduino IDE.
If you don’t have a programmer to connect your microcontroller, you can also use an Arduino as a programmer to upload your programs. To use serial monitor, with your microcontroller, you can also use an Arduino as a bridge.
I have put together all of this into a github repo called Arduino Extra Cores. Right now it supports both ATmega 16 and ATmega 16A family of microcontrollers. I am planning to support for more microcontrollers soon.
Feel free to check it out and also to use it as your template. If you managed to port a new microcontroller, I would be happy to merge it into my Arduino Extra Cores repo.
Happy Hack’ing 🙂
Update: Kindly note that this works only in Arduino 1.0.x branch. The structure of hardware folder has changed in Arduino 1.5.x branch and I have not updated the core yet to support it. Will post an update, once I had support for Arduino 1.5.x as well.