After reading my recent tutorial on using Arduino code in non-Arduino microcontrollers, one of my readers asked me if it is possible to use Arduino as an ISP programmer to program these micro controllers, instead of using a separate dedicated AVR programmer.
The answer is a definite yes and I use it all the time, since I have a lot of Arduinos lying around. I thought of writing a tutorial, so that it will be useful for others who want to do this.
In this tutorial, I will show how you can program a non-Arduino AVR microcontroller like AtMega 16/16A using Arduino as an ISP programmer.
Loading Arduino ISP sketch
By default Arduino IDE comes with an ISP sketch. All you need to do is to open it up in your Arduino IDE (or using my Arduino makefile), then connect your Arduino to your computer and then upload the sketch to your Arduino.
You should not connect anything else to your Arduino at this point and you will find the Arduino ISP sketch in File -> Examples -> ArduinoISP
Installing Arduino core for your microcontroller
The next step is to find the Arduino core support for the microcontroller you want to program and then install it.
If you want program ATMega 16/16A, then you can use my “Arduino extra core“. I have also written a separate tutorial explaining how to use it. Or if you want to program ATtiny microcontrollers, then you can use the ATtiny core by David Mellis, one of the co-founders of Arduino.
Most of the time, you just have to place these core files inside /hardware directory in your sketchbook folder, but consult the documentation of the actual core library you are using.
Connect the circuit
The next step is to connect the microcontroller to your Arduino. The below diagram shows how to connect ATMega 16/16A. In general the principle remains the same for other micro controllers as well.
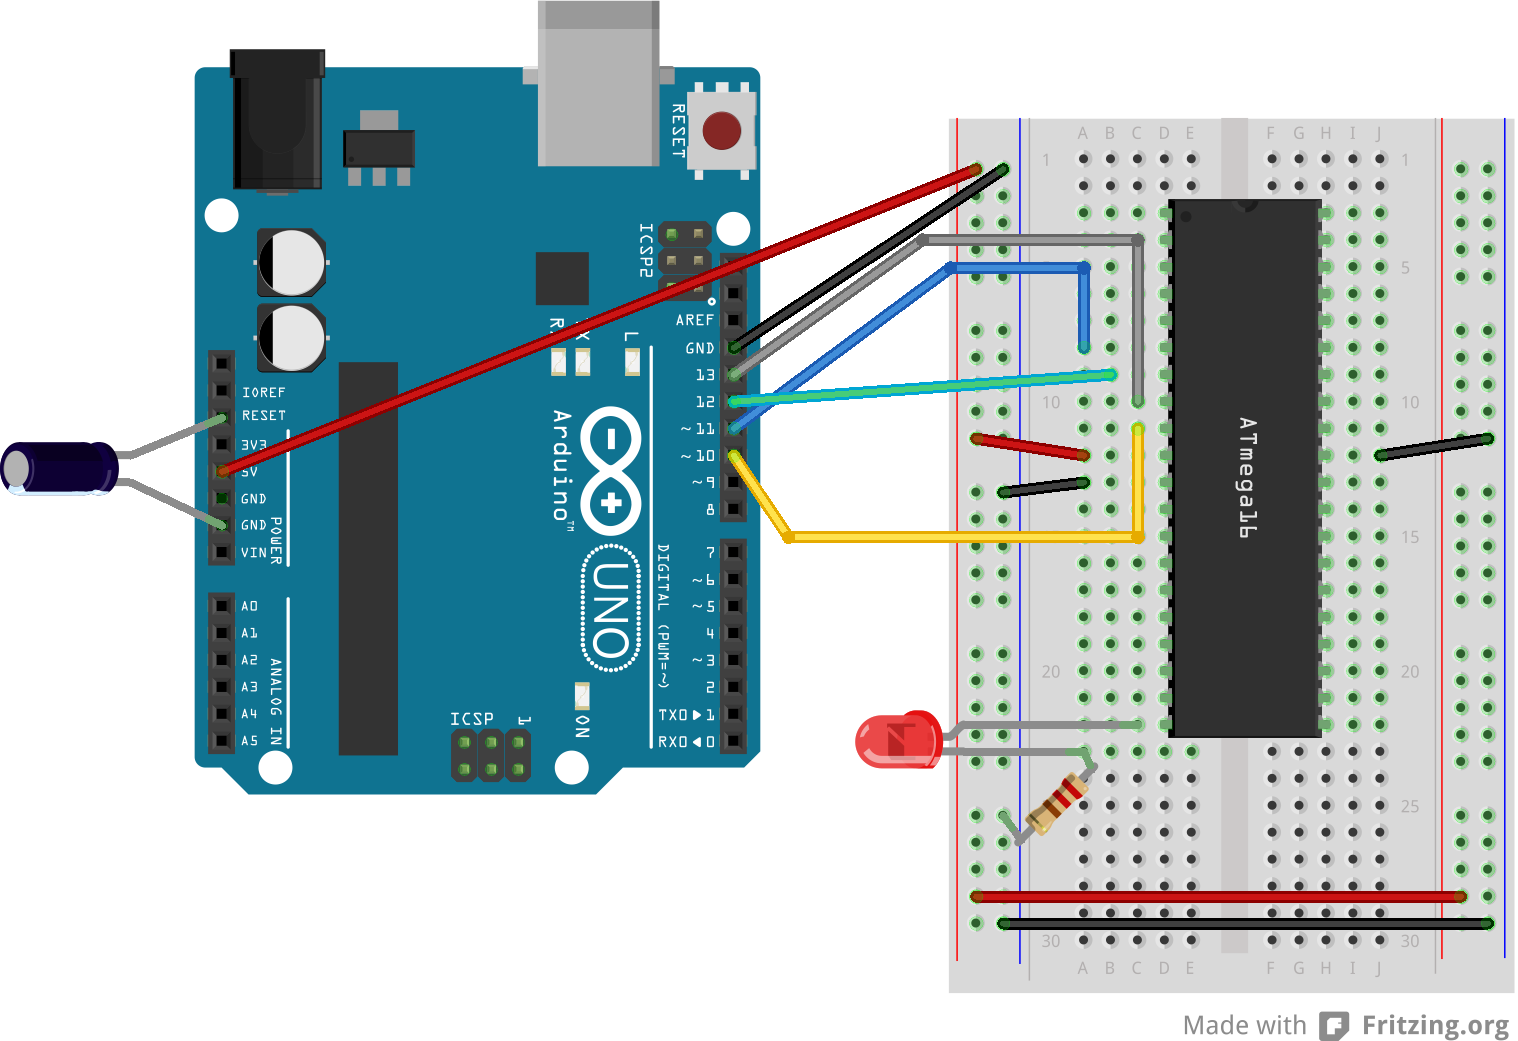
Program ATMega 16 using Arduino as ISP Programmer
The following are the different pin connections
- Arduino Pin 13 to ATMega 16 Pin 8 (or SCK of another microcontroller)
- Arduino Pin 12 to ATMega 16 Pin 7 (or MISO of another microcontroller)
- Arduino Pin 11 to ATMega 16 Pin 6 (or MOSI of another microcontroller)
- Arduino Pin 10 to ATMega 16 Pin 9 (or RESET of another microcontroller)
- Arduino 5+ to ATMega 16 Pin 10 (or Vcc of another microcontroller)
- Arduino Gnd to ATMega 16 Pin 11 (or Gnd of another microcontroller)
- 10 uF capacitor between Arduino Reset Pin and Gnd Pin (+ve leg of capacitor should go to Reset pin)
- LED through proper resistor on any pin of the microcontroller, which you will be controlling through code
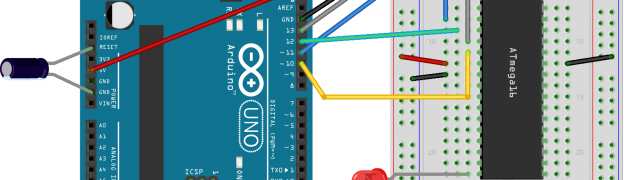
This is how my connection looks like
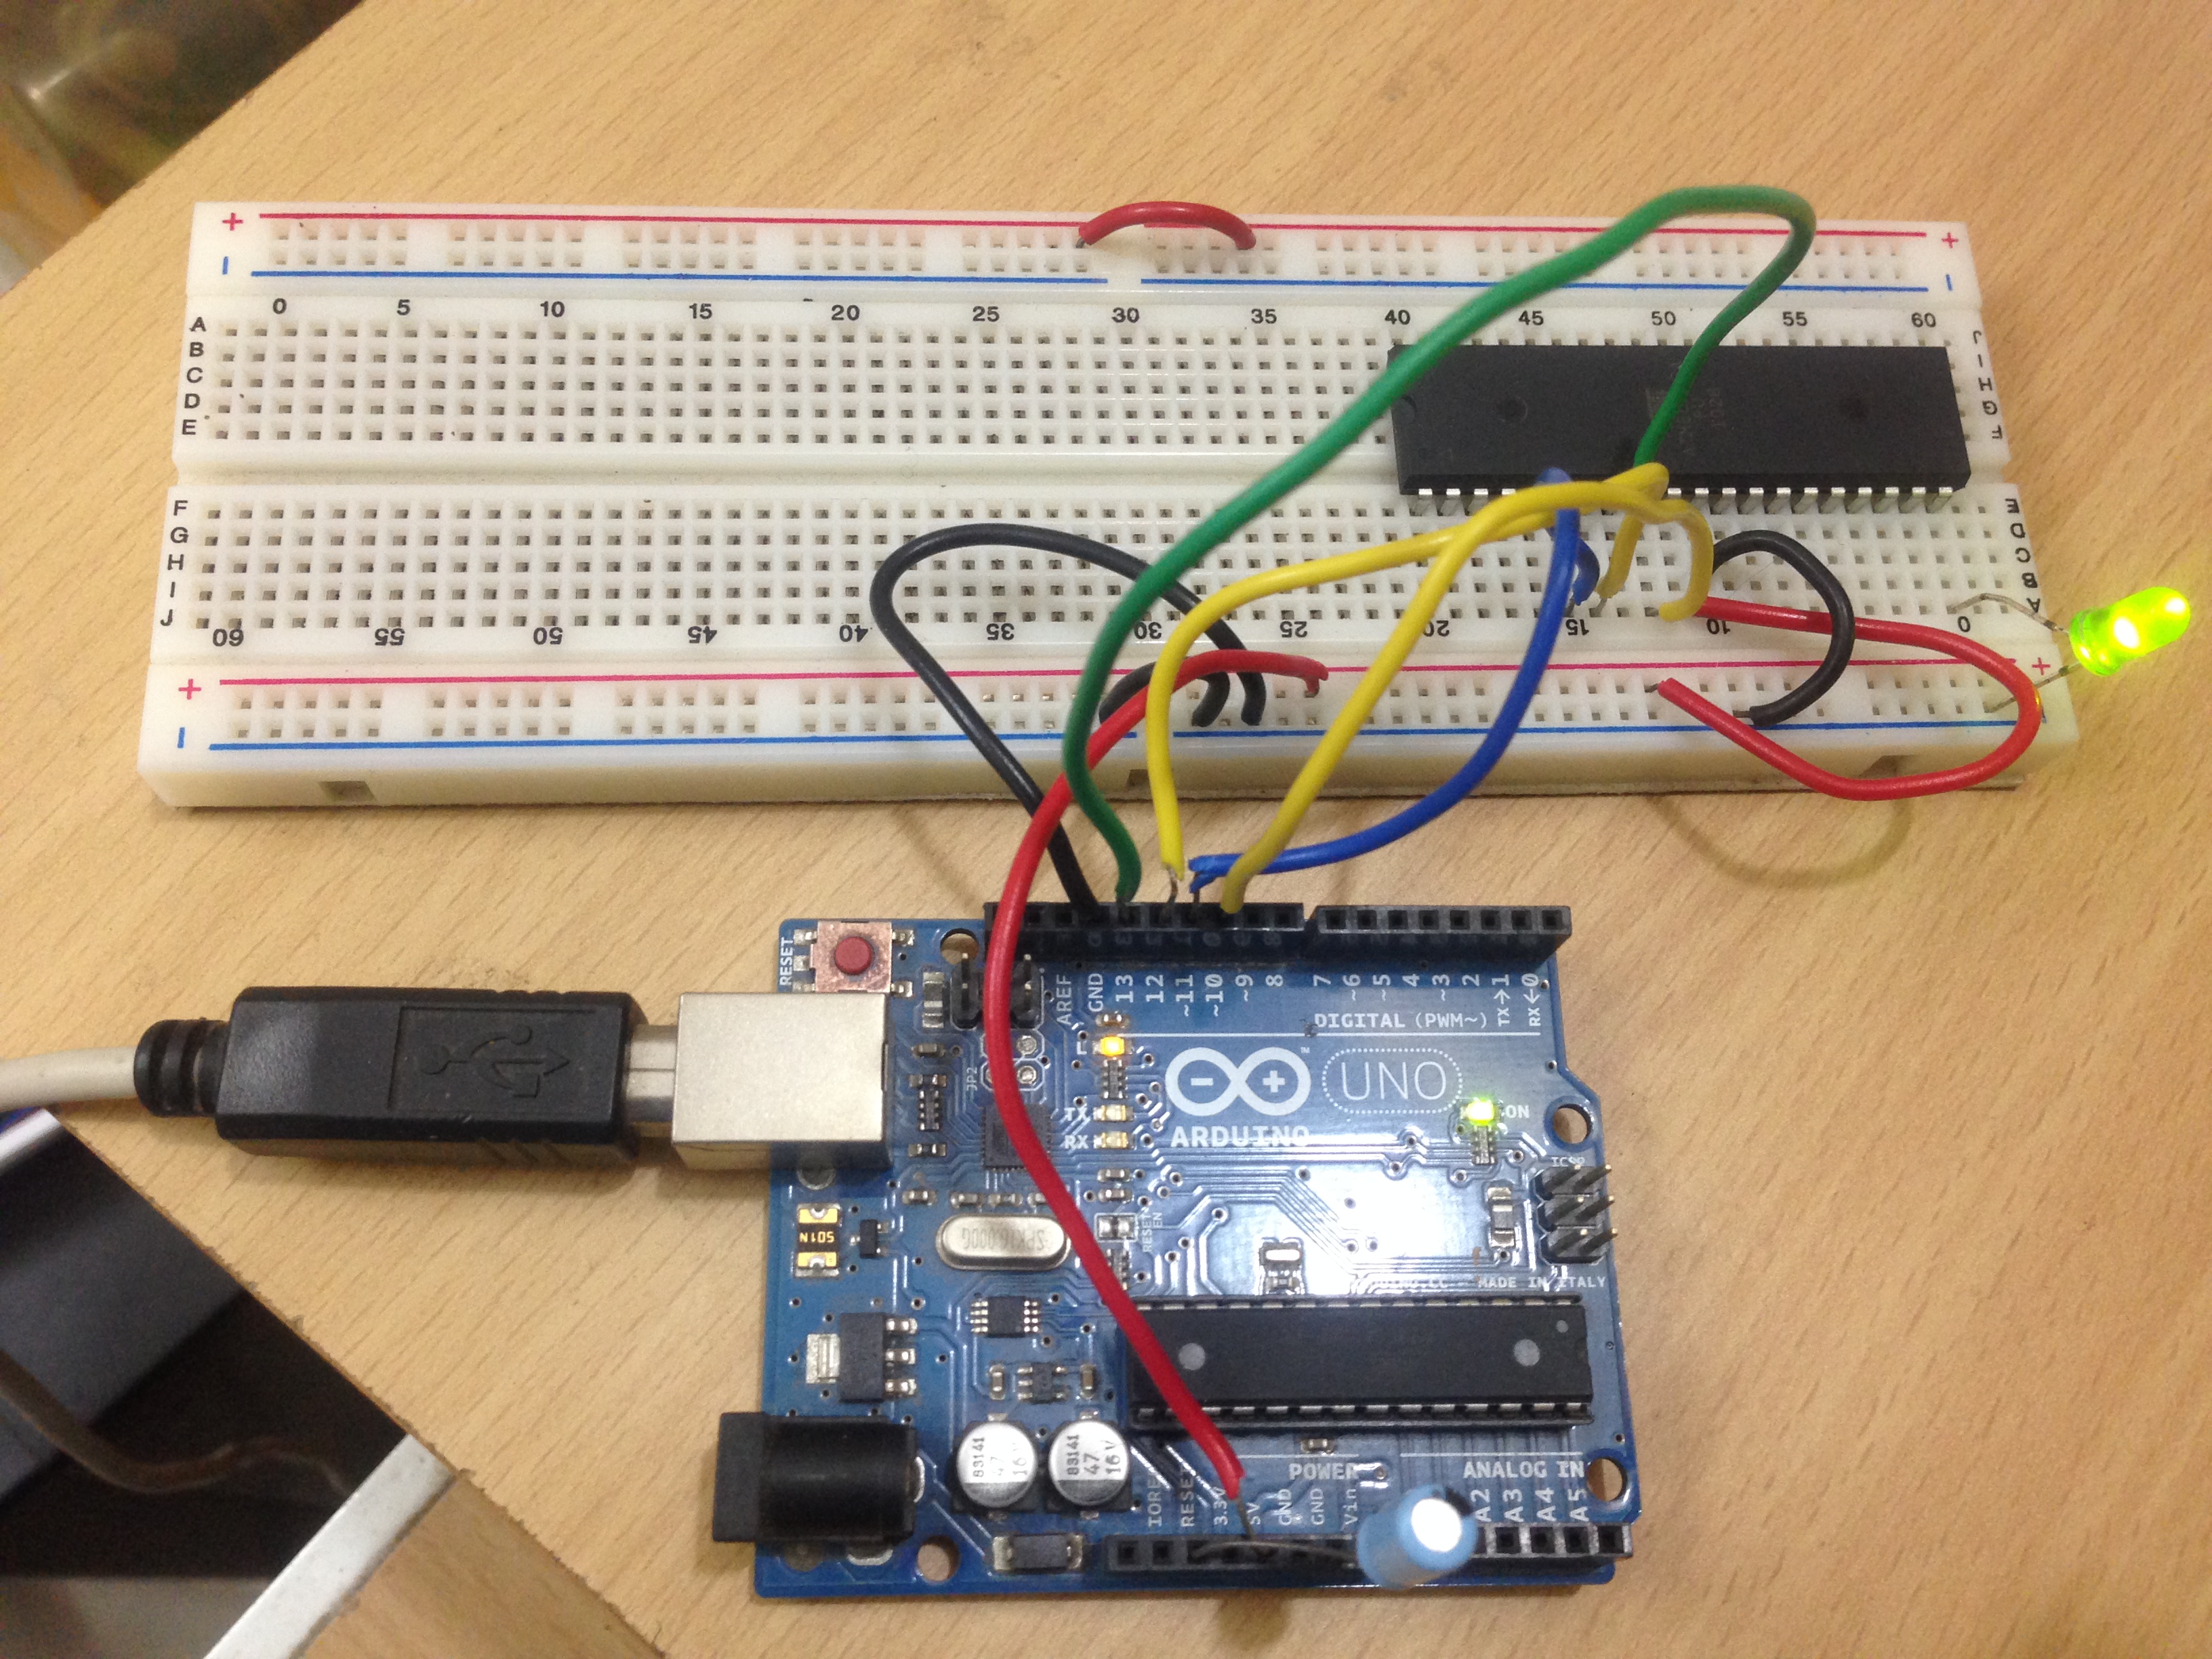
Program ATMega 16 using Arduino as ISP Programmer
Burn bootloader/fuse
The next step is to burn the bootloader or/and fuses. For most cores, you don’t need to use the bootloader.
My Arduino extra core doesn’t need any bootloader, but only needs some fuses to be set.
You can burn the bootloader and/or the fuses, by selecting Tools -> Burn Bootloader. Make sure you have chosen the correct board type before you do that.
Upload your sketch
Now, everything is ready, and all you need to do is to write your sketch and then upload it. The ISP sketch that your burned into your Arduino, will take care of the rest.
To use serial monitor, with your microcontroller, you can use my other tutorial which shows how you can use another Arduino as a bridge.
Upload your sketch using makefile
My Arduino makefile also supports uploading sketches through Arduino ISP programmer. Follow all the normal instructions and then define ALTERNATE_CORE and ISP_PORT in your makefile and run make ispload target.
Happy Hacking 😉