There is a huge variety of shields that are available which can be stacked on top of an Arduino. Often there are more than one manufacturer for a single type of shield itself. In a way this is good, because as a user you are going to have multiple options. But it becomes a problem when the shield is pretty complex (like the USB Host Shield) and you have to use a library and the shields are not compatible with each other. One such shield which has many incompatible versions is USB Host Shield and in this post I am going to tell you how you can select the proper shield and also the changes that you have to do to make even the incompatible shields work with the library.
What is an USB Host Shield?
Before we start, let’s first understand what is an USB Host Shield. It is a shield which provides USB Host support for Arduino.
So, what is USB Host support? The USB protocol defines two types of devices. One is called the host (or server) and the other one is called peripheral (client). The Host device controls the peripheral device and also provides power to it. When you connect any USB device like a mouse or a keyboard to your computer, your computer acts as the host and controls (or polls) the client device (keyboard or mouse or even an Arduino). For a successful communication to happen using USB protocol, you need at least one of the device to be the host, which means that you cannot connect two keyboards together and expect them to communicate with each other.
The USB Host shield has a separate chip (usually Max3421E), which provides USB Host support. Once you have this shield, your Arduino board can act as USB Host and you can connect other USB devices like keyboard, mouse or even an Android phone and communicate with the device from Arduino itself.
What you can build using USB Host Shield
USB Host shield can be used to interface any USB device to Arduino. The following are examples which I have built using the shield.
- Make Android phone interact with Arduino using Android Open Accessory protocol.
- Interface a Wii remote with Arduino.
- Interface a USB Missile Launcher with Arduino.
Available Hardware Options
The following are the various versions of USB Host Shields from different manufacturers.
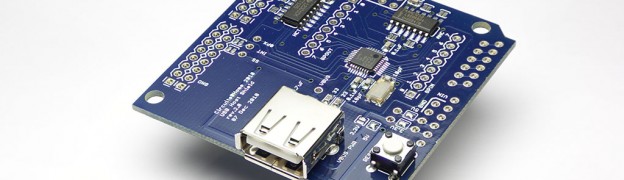
- USB Host Shield from Circuits @ Home
- Old Sparkfun shield (part no DEV-09628)
- New Sparkfun shield (part no DEV-09947)
Available Software Libraries
The following are the two libraries that are available for USB Host Shield. Both of them are from Oleg of Circuits @ Home.
Out of these two, the v1.0 of the library is kind of deprecated. Use it only if you really need to or have to use some other library that depends on it, otherwise use only v2.0.
Selecting the right shield
If you have not bought the shield yet, then just go ahead and buy the shield from Circuits @ Home and use v2.0 of the library. The library works out of the box and you don’t need to modify anything.
But if you have already bought the shield from Sparkfun, especially the old (like me) then read the next section to find out the changes that you have to do to the library to make it work with the shield.
Making the Sparkfun shields work
Choose the instructions from the right section below based on your shield and library version.
Old Sparkfun shield (part no: DEV-09628) with v1.0 of the library
The old sparkfun shield has two issues. First, the GPX and RESET pins are swapped and the second it has power issues.
To solve the first issue, you have to make the following change on line number 24 of the max3421e_constants.h file in the library.
Alternatively if you are using my makefile to compile Arduino sketches (more about it in a separate blog post soon), then you can grab my fork of the library and add the SPARKFUN_9628_SHIELD define to your makefile.
To address the second issue, you have to add an external power source to the shield like a battery or wall adapter, even if you have connected the Arduino through USB cable.
Old Sparkfun shield (part no: DEV-09628) with v2.0 of the library
In v2.0 of the library the communication happens over the SPI pins and therefore you don’t have to make any change to the library. But to fix the swapped pin use you have to short the pin D7 to RESET. Take a small jumper cable and connect one end of it to D7 pin and the other end to the RESET pin (next to the 3.3V pin). This is the only change that is needed to get v2.0 of the library to work.
In addition to that you should also use an external power supply.
New Sparkfun shield (part no: DEV-09947)
The new Sparkfun shield has fixed the swapped pin issue, but it still has power issue. So to use this shield with both v1.0 and v2.0 of the library, you don’t have to make any changes to the library, but you should still connect the external power source.
Related boards
The following are some of the boards that also provide USB Host support.
- Google ADK board (You can also use a normal Arduino and USB Host shield as an ADK board if needed)
- Mega ADK