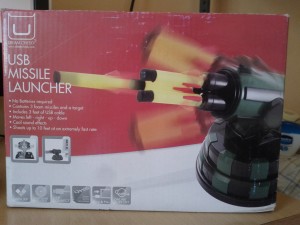
While cleaning my room the other day, I stumbled upon a couple of old toys which I bought from US for myself. (Who said you have to grow up 😉 )
I was going through the packs and found an old USB Missile Launcher and thought of putting it into some good use.
USB Missile Launcher
 So what exactly is a USB Missile Launcher? It is a small geek office toy, which you can use to launch missiles (unfortunately foam as of now) on your team mates (or your manager).
I bought mine from ThinkGeek, but they seem to available in lot of other places as well.
USB Interface
The interesting part of the device is that you can connect it to your computer using USB and control its movement as well as firing of missiles. The device which I bought came with a windows only software which allows you to control it from your computer.
I did a quick web search and found that the USB interface used by the device is pretty straight forward. You just have to make a USB ctrl request with a particular code for each direction.
Python Code
I quickly wrote a python script using PyUSB, and was able to take aim and launch the missiles 🙂
The following is the main part of the code, which just involved in making a ctrl request
Connecting to Arduino
While it was fun controlling the device from the computer, it quickly dawned on me that using a computer is an over kill for such a trivial task. I then thought it would be cool, if I can control it from an Arduino.
USB Host Shield
I quickly stacked a USB Host Shield on top of the Arduino so that I can easily control the device.
If you are wondering what is a USB Host shield, then do read my article about USB Host Shield and Arduino, which I wrote a couple of weeks ago. In short, a USB Host Shield, gives USB Host capabilities to an Arduino.
Making it work
After stacking the USB Host shield on top of Arduino, all I needed to do was to make the ctrl request. I quick scanned the USB Host Shield library and found that the USB class had a ctrlReq method, which sends the proper request to the device.
I called that method with the same data that I passed in the python code and the device started responding to my commands. Mission accomplished 🙂
Video
I quickly wrote a sketch that took commands from the serial monitor and controlled the missile launcher based on it. You can see it in action in the below video.
Arduino Library and Examples
I quickly wrote an Arduino library to control the USB missile launcher. The library abstracts out the low-level code and commands, so that you can just use the library instead of worrying about the commands that you need to send through USB.
I also created two example sketches, which shows you how to use the library. You can find these inside the examples folder of the library.
Try out the library and do let me know if you face any issues.
Happy missile launching 😉
Pingback: Controlling USB Missile Launchers using Arduino | Hardware Fun | Open Hardware News | Scoop.it
Pingback: Accessing GPIO pins of Max 2314 IC in USB Host Shield | Hardware Fun
Pingback: Accessing GPIO pins of Max 3421 IC in USB Host Shield | Hardware Fun
I’m trying to use this library with this missile launcher:
http://www.thinkgeek.com/product/8a0f/?srp=3
But the turret isn’t responding to the commands. One thing I’ve noticed is that when the software it comes with is opened, a red LED turns on on the turret, but not when it’s plugged into the usb shield. Any advice?
I have not personally tried it, since I don’t have the device with me.
But one thing you might want to try out is to try providing an alternate power source to the USB Host shield.
Also, which USB Host shield you are using?
I’m using the usb shield you used. I don’t think the shield is the problem though. I was able to charge my phone by plugging it into the shield. I fear that there’s something in the firmware preventing it from accepting commands from something other than their software.
Or, it could also be that they have changed the hid of the device. My library looks for a specific range of hid.
Unfortunately I don’t have have a device with me to try it out.
What do you mean by hid?
hid, is a unique id for each device which is used by the USB protocol.